
Time Intelligence in Data Modelling Part 1: Calendar Table
1 februarja, 2021
Time Intelligence in Data Modeling Part 3: Dynamic Calendar in Power Query
1 februarja, 2021
Time Intelligence in Data Modelling Part 1: Calendar Table
For Power BI version 2.84.701.0 64-bit (August 2020) and Power Pivot for Excel version 2007
Calendar table is an essential part of every data model. We have seen how it looks and feels in Part 1 of the series. Let’s look at how to quickly create a calendar table in Power Pivot and Power BI.
Remove Time and Birth Date Columns
We will use the functions that automatically detect earliest and latest date in your data and generate a Calendar table. Since we don’t want to end up with a massive calendar table it’s important to spend some time assesing your data. Identify relevant and redundant date columns. Things like birth dates of employees are usually meaningless for business analysis. If not neccessary, you definetly don’t want them in your calendar table, as they could push the start date of your calendar decades before your actual business data starts.
For example, it the company runs from 2000 and one employe birth date is 9/1/1970, this would add up 30 years of unnecessary rows to your calendar. Similarly with time data. Each time data is read as time on day 1/0/1900, adding up an entire century of rows to your calendar table. Remove the time and birth date columns from your data.

Calendar in Power Pivot
Creating a calendar table in Power Pivot is fairly simple. We remove time and birth date columns from our tables. In our example we have four tables that we loaded into Data Model.

We then select Design > Date Table > New.
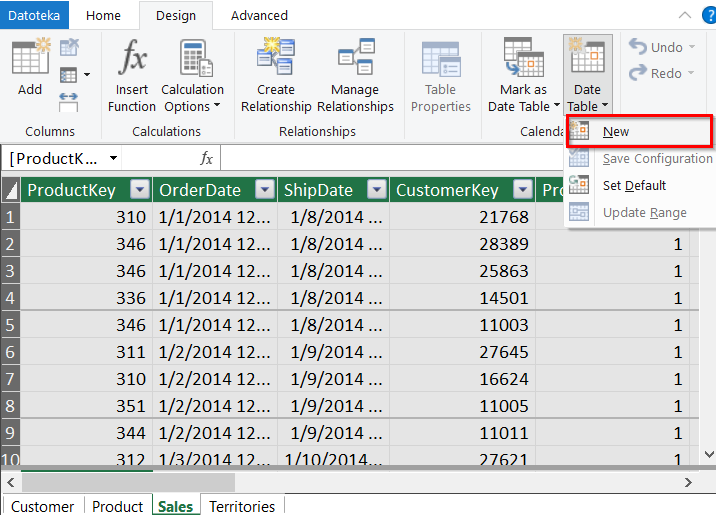
Calendar table is created, containing all the dates between earliest and latest date found in the four data tables.

We lastly connect the Calendar to Sales table. Select Diagram view.
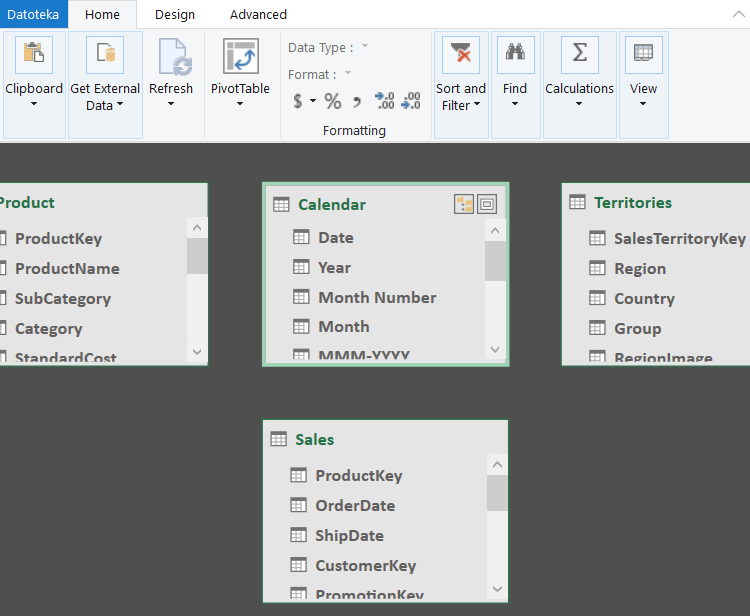
We drag Date from Calendar table and drop it on OrderDate in Sales.

We drag Date from Calendar table and drop it on OrderDate in Sales.
Calendar in Power BI
Creating a table in Power BI is similarly simple. We’ll use CALENDARAUTO() function. CALENDARAUTO() detects earliest and latest data in our tables and creates a table of all the dates in between.
We first make sure to remove time and birth date columns from our tables. We also then turn off the Auto date/time for new files. This setting creates a hidden calendar table for every date column in your data model. We don’t want a separate calendar for each date column. We find the setting at File > Options > Data Load > Auto date/time for new files and remove the tick mark.

We are now ready to create a calendar table. We select Table tools > New table.

We type in Calendar = CALENDARAUTO().
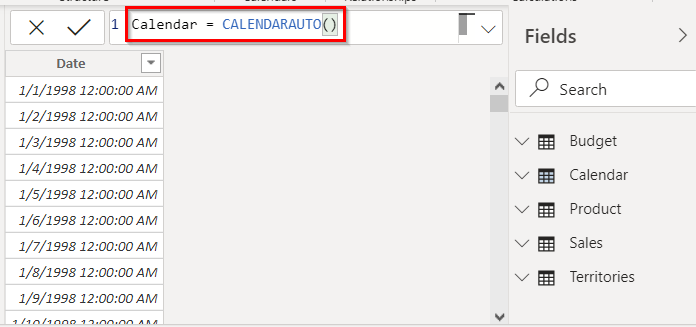
A new table Calendar is created, containing all the dates between the earliest and latest date in our data. We add the atributes with DAX formulas:
Year = YEAR(‘Calendar'[Date]),
Quarter = QUARTER(‘Calendar'[Date]),
Month = MONTH(‘Calendar'[Date]),
Year = YEAR(‘Calendar'[Date]),
WeekdayNo = WEEKDAY(Calendar[Date]),
WeekNo = WEEKNUM(Calendar[Date]), etc.

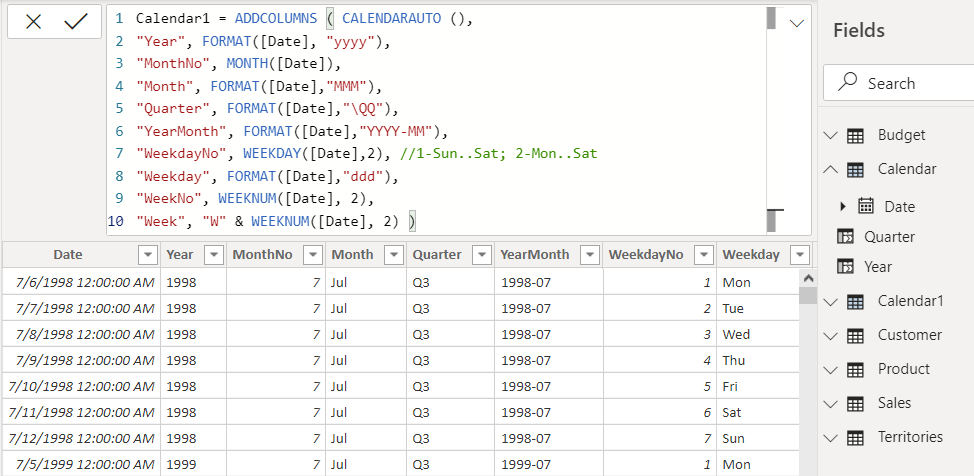
We can also create Calendar table with all the attributes using a convinient formula bellow:
Calendar = ADDCOLUMNS ( CALENDARAUTO (),
“Year”, FORMAT([Date], “yyyy”),
“MonthNo”, MONTH([Date]),
“Month”, FORMAT([Date],”MMM”),
“Quarter”, FORMAT([Date],”\QQ”),
“YearMonth”, FORMAT([Date],”YYYY-MM”),
“WeekdayNo”, WEEKDAY([Date],2), //1-Sun..Sat; 2-Mon..Sat
“Weekday”, FORMAT([Date],”ddd”),
“WeekNo”, WEEKNUM([Date], 2),
“Week”, “W” & WEEKNUM([Date], 2) )
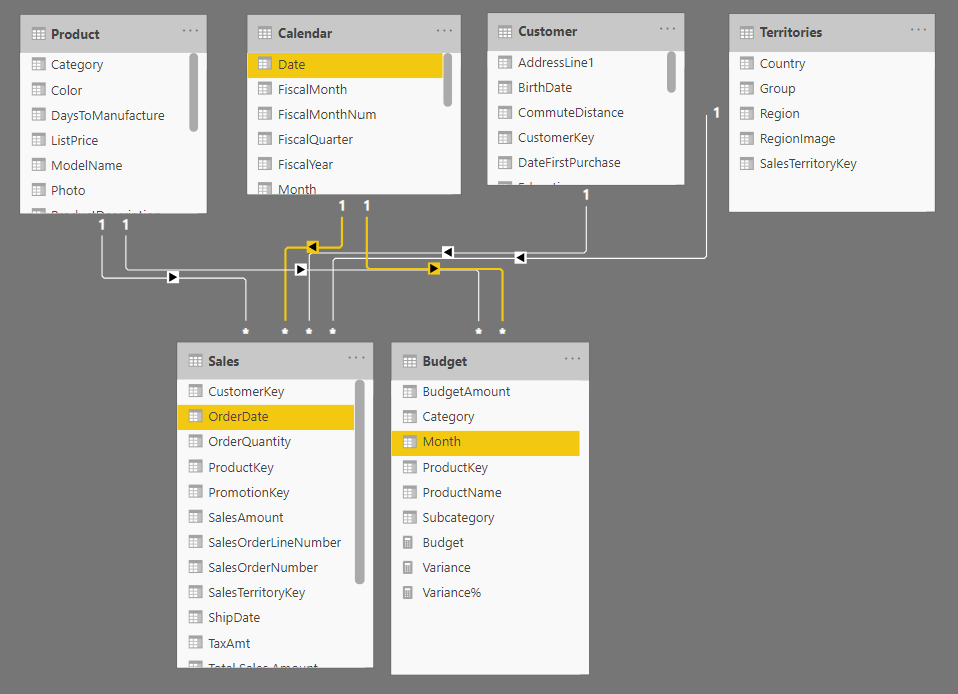
We lastly connect the Calendar table with the fact tables: we drag Date and drop it on OrderDate in table Sales and Month in table Budget. We are now set to use our calendar.
Creating a table using CALENDARAUTO() is not the best way to go. Data refresh could bring in a new time column that will be treated as a date 1/0/1900 and size up our calendar considerebly. Using Power Query for creating a calendar table gives us more control. We will learn how to create calendar table in Power Query in upcoming parts of the Series.


