Time Intelligence in Data Modelling Part 1: Calendar Table

Dynamic Calendar with DAX in Power Pivot and Power BI
Time Intelligence in Data Modeling Part 2: Dynamic Calendar with DAX in Power Pivot and Power BI
February 1, 2021

Time Intelligence in Data Modelling Part 1: Calendar Table

The calendar table is the most important table in Power BI data table. It is simply a table of all the consecutive dates between the selected start and end date. Each row contains one date and is thus unique.

Beside the date the table usually contains attributes like year, quarter, month, day, day of week, week of year etc. It is usually a large table, since data in our model normally spans over multiple years. We use calendar tables to filter our data to various periods, for example revenue in 2019.

How Calendar Table Works

In data model we have two types of tables: a fact table and smaller dimension tables. Fact tables are large tables that grow daily, for example a table of Sales, where each row represents one sale. Dimension tables are small tables that rarely change, for example a table of Products, Salespersons, Business Units etc. They contain unique values. We often position dimension tables high and fact table below in our data model, as in the image below.

We usually have multiple dimension tables that connect to a fact table. We connect the tables by column that appears in both dimension and fact table. We can then use the dimension tables to filter the big fact table.

For example, tables Product and Sales are connected by the ProductKey column. We filter the Product table via a slicer in the report: we select Blade.

First, table Product is filtered, leaving only rows with where Product[ProductName] = Blade. The filter then propagates through connection and flows down to the Sales table, leaving only the corresponding rows – rows with the product Blade.

Calendar table is a dimension table. We connect the Date column with the corresponding Date column in fact table. We can now filter the fact table with dimension table. For example, when Calendar table is filtered via slicer to year 2019, only rows with Calendar[Year] = 2019 remain. The filter then propagates down to fact table and leaves out only rows with the date year 2019. This comes in especially handy when we have more than one fact table. We can then use Calendar to filter both large fact tables at once!

How Date is Stored

You should know how Power BI and Excel store date when heading into the realm of time analysis. One thing most people don’t know: date is actually number. And not just any number, it’s a number of days passed since 1/1/1900. Let’s do a quick test in Excel: write numbers from 0 to 3 in three separate columns. Format the first column as number, second as date and third ad time. You’ll see how the date column corresponds to the date, starting with »date zero«, 1/1/1900. For example, number 3 gives us a date 1/3/1900. The decimal part represents the time of day, so 0.5 would mean half of the day or 12 PM, etc.

We’ll use this fact later. Bottom line worth remembering is that dates are actually numbers, formatted to represent dates.

Turn off Auto date/time for new files

The first thing you want to do when starting a project is to turn off the Auto date/time for new files setting. What this setting does is create a hidden calendar table for every date column in your data model. Your data will usually have multiple date columns like Deal Date, Pay Date, Birth Date, etc. This would mean three separate hidden calendar tables that would slow your model down.

Instead, we rather turn this setting off and create a Calendar table manually. It may seem like a hassle but this gives us full control over dates used in our Calendar table. We find the setting at File > Options > Data Load > Auto date/time for new files and remove the tick mark. Good riddance!

Calendar Table post - Image 1

Time Intelligence Functions

Time intelligence functions are functions like TOTALYTD(), TOTALMTD(), TOTALQTD(), DATEADD(), DATESBETWEEN() etc. They enable us to do in thorough time analysis of our data. All business reports will surely need TOTALYTD() function, meaning a sum of values from the beginning of the year up to the current date. Time intelligence functions only work on continuous dates, meaning a Calendar table. We will take a closer look at time intelligence functions in upcoming parts of the Time Intelligence in Data Modelling Series.

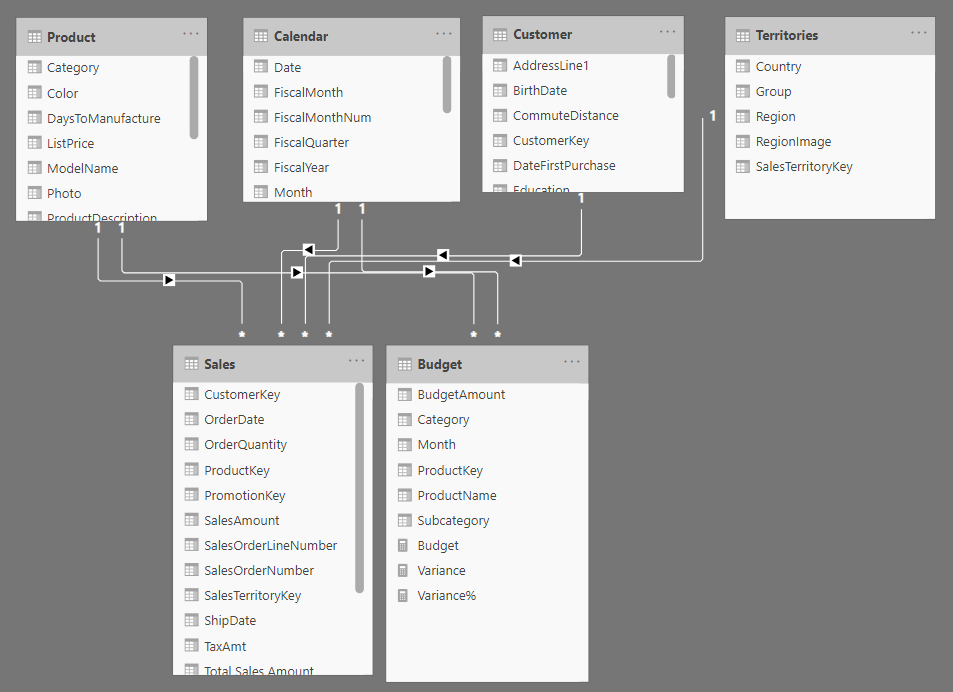
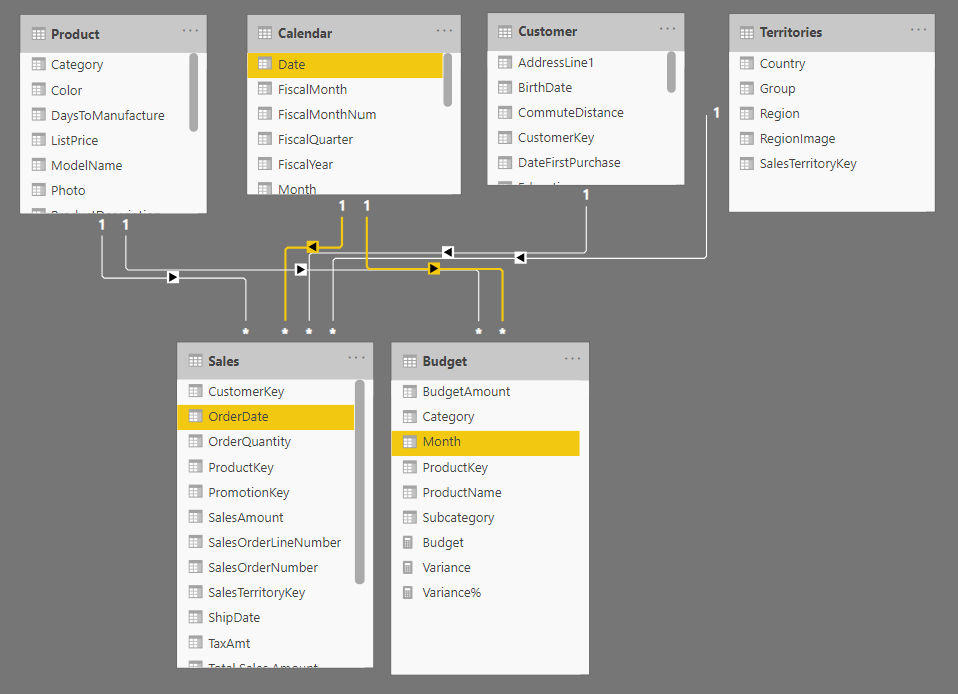
How to Create Calendar Table

There are multiple ways to create a Calendar table. A fast way is to use the CALENDAR(StartDate, EndDate) function that creates a table of all the dates between the StartDate and EndDate. StartDate and EndDate should be the first and last day of the year, to ensure time intelligence functions work properly. We can then add attributes like day, week, month and quarter manually. The problem here is you that you hardcoded the start and end date. If later (or earlier) dates appear in the data once you refresh your model, they won’t be included in the calendar.


Another way is to use CALENDARAUTO(), which automagically reads the earliest and latest date in your entire data model and creates a table of all the dates between them. You can read more about this technique here.

This way also has a problem: your data will often have date columns that are irrelevant for business analysis. For example, birth dates of your employees can push the earliest date in your data model 60 years back. You don’t want all those redundant rows in your Calendar table to slow your model down.

The best way to create a calendar table is manually, not via a function. This is the way to go if you want to build a good data model. Understanding how to control dates used in your Calendar table is crucial for building optimized Power BI projects. We will learn how to create a calendar table in the following parts of the Time Intelligence in Data Modelling Series.

Here is a wonderful resource for the Calendar table. From how to create one in Excel, DAX or Power Query to extending a Calendar Table with brilliant columns that allow you to extend your reports.